So watching Junior Bake off last night inspired me to try something I’ve never tried before ‘free from.’
R decided he wanted dinosaurs in the middle, but in hindsight I think they were a little two small and fiddly!
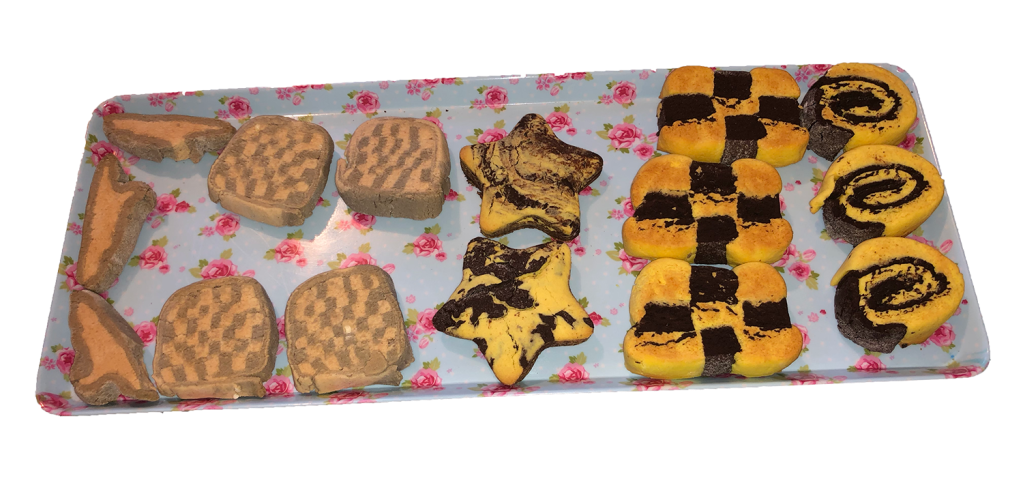
I made all of these biscuits today, just trying different things out, I love the checkerboard ones and the swirls. I had a few issues with the recipes for the yellow and black ones. The brown and grey ones worked really well! So here’s the recipe…
Ingredients
- 50g dairy free butter (I use block stork)
- 75g caster sugar
- 1 egg
- 1 tsp vanilla extract
- 250g gluten free plain flour
- 1 tsp gluten free baking powder
- 1 tsp cinnamon
Method
Please note that my squares were not defined enough so I’m advising you to do less layers in this recipe.
- Cream together the butter and sugar. Add the egg and vanilla extract and mix.
- Sieve the flour, baking powder and cinnamon in and mix until dough forms.
- Split the dough in half and add food colouring (I used black, I currently only have yellow and black ha ha).
- Split both lots of dough in half again and lightly flour a work surface, roll one colour dough into a rectangle (about 1cm thick my 4cm wide), then roll the other colour dough into the same size and thickness rectangle, stack this on top of the first rectangle and continue with the other two lots alternating colours and stacking them on top.
- Then get a sharp knife and cut down the length of the stack (about 1cm thick), you should get a rectangle with alternate coloured stripes (not the end so that you get squares). Lay this flat.
- Do the same as step 5, but when laying the rectangle down flip it over so that you have two rows of checkerboard. Continue doing this step, flipping the rectangles so that the same colour only touches in the corner, until all the dough is used (you should end up with 4 rows and columns).
- Wrap your checkerboard cuboid up and put it in the fridge for 30 minutes.
- Preheat your oven to 180C.
- Get your cuboid out of the fridge, get a sharp knife and cut square biscuits from the end about 5mm thick, pop these on a baking tray and bake in the oven for 10 to 15 minutes.
I used some of this dough to cut out dinosaur shapes and then wrapped it in the other colour to make ‘inside out’ biscuits. However the dinosaurs were too small and it was extremely fiddly, so if I ever do this again I will use a bigger shape.
I also tried a variety on the above biscuit I tried a honey flavoured biscuit, with 1tbsp of honey added to the mix (yellow) and I paired it with a chocolate flavour, where I substituted 1/4 of the flour for cocoa powder (black). However the honey dough was too soft and the chocolate biscuit was too ‘rigid’ which made attempting the checkerboard very difficult because they were different consistencies. I also cut the biscuits too thick which has made them like biscuits on the outside and cake in the middle.
Due to my trouble trying to do the checkerboard I attempted a swirl biscuit, which worked better but the chocolate dough was still too rigid, so I managed a few of those and then just mixed the doughs together to make the stars.
The idea of this blog is not that we are going to get perfect results each time, but to give some ideas and inspiration. I also know that my ‘finesse’ needs working on, but I’m still learning (yes even 5 years later)!
